Key Takeaways:
- Planning your bathroom renovation first helps you avoid budget surprises, product delays, and layout mistakes that slow down the build.
- Creating a detailed cost breakdown by category (labor, materials, fixtures, tile) with a 15-20% buffer prevents mid-project financial stress.
- Ordering long-lead items like vanities, glass shower doors, and specialty tile early prevents work stoppages when materials arrive late.
- Keeping plumbing fixtures in their current locations saves thousands compared to rerouting drains and supply lines.
- Hiring a general contractor like Superior handles permits, inspections, and trade coordination so homeowners avoid managing multiple subcontractors.
You’ve decided to remodel your bathroom. You’ve scrolled through inspiration photos. You’ve imagined the walk-in shower, the floating vanity, the rainfall showerhead that makes every morning feel like a spa day.
Then reality sets in. Where do you even start? How much does this actually cost? Do you need permits? Can you keep the toilet where it is or does everything need to move?
Planning your bathroom renovation first helps you avoid budget surprises, product delays, and layout mistakes that slow down the build. This guide walks you through 7 simple steps to plan your timeline, create a bathroom renovation plan and floor plan, budget with a cost breakdown, and decide when to hire a general contractor.
Step 1: Set Your Bathroom Remodel Goals and Scope
Start by clearly defining what you’re changing and what can stay. This distinction controls your budget more than any other factor because moving plumbing fixtures costs significantly more than replacing them in their current locations.
Decide What You Are Changing
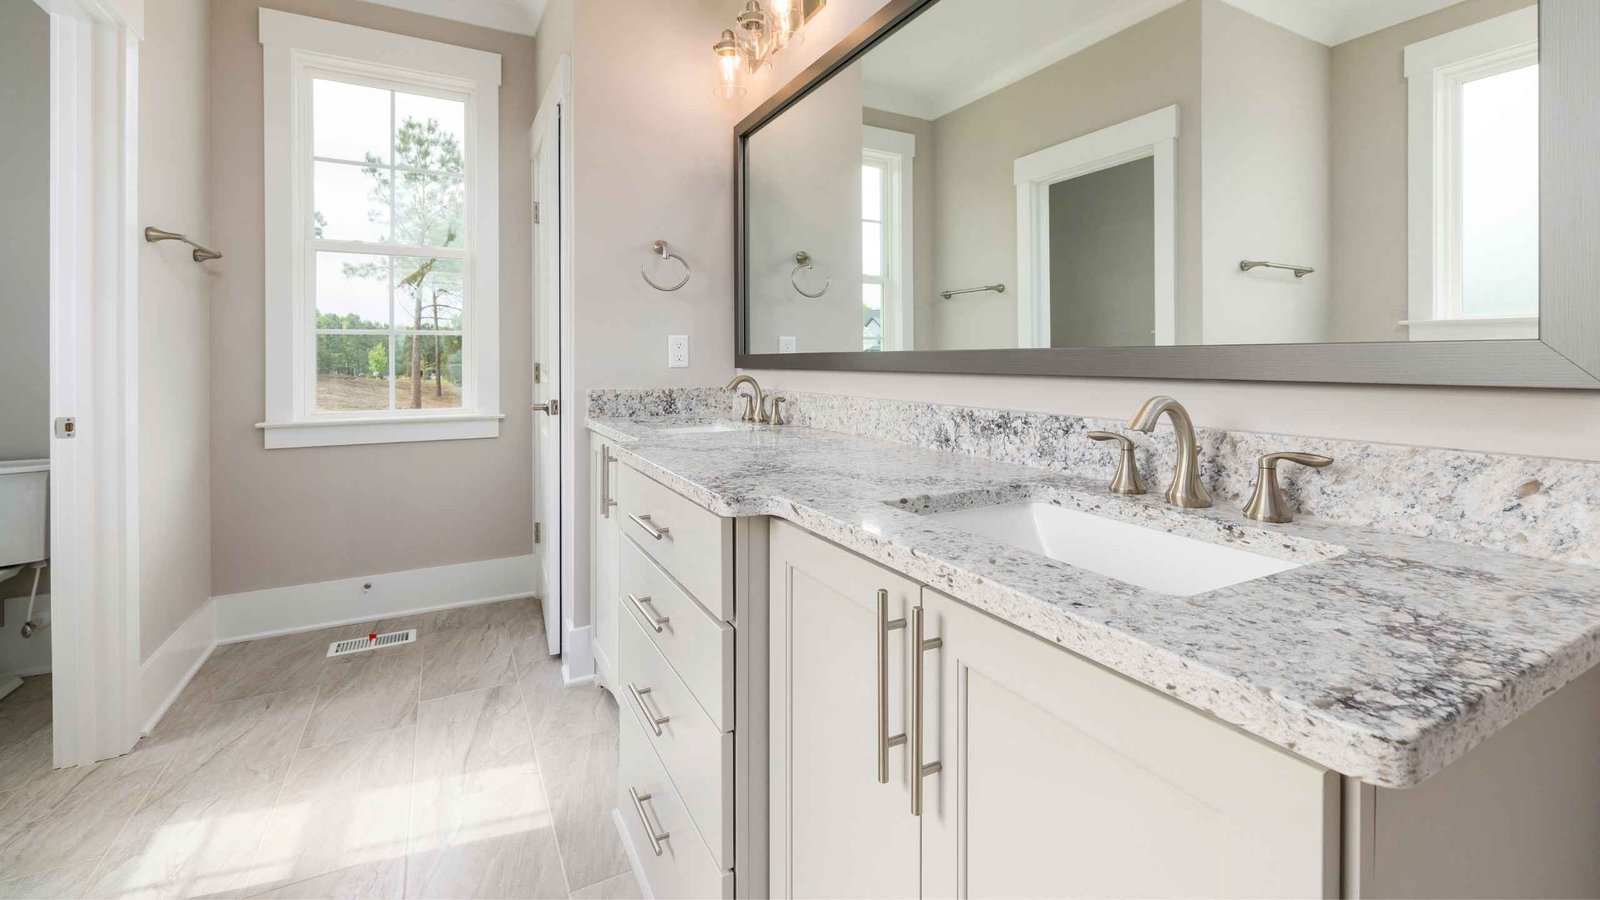
Walk through your bathroom and identify specific upgrades you want. Are you converting a tub to a walk-in shower? Replacing the vanity with a double-sink version? Installing new shower wall tile floor-to-ceiling? Upgrading lighting fixtures from dated vanity bars to modern LEDs? Replacing worn flooring with durable tile or luxury vinyl?
Write down every change you’re considering, even small ones like new hardware or a medicine cabinet. This complete list becomes your project scope and prevents forgotten items that cause budget overruns or timeline delays when you realize mid-project you need something you didn’t plan for.
Decide What Can Stay
Keeping plumbing fixtures in place usually saves $2,000 to $5,000 compared to rerouting drains and supply lines. If your current toilet location works functionally, leave it there. If your vanity placement allows adequate storage and doesn’t block traffic flow, replace the vanity in the same spot rather than moving it across the room.
Evaluate your existing layout objectively. Does the current configuration create daily frustrations or just feel dated aesthetically? If the layout functions well but looks tired, cosmetic updates deliver better value than expensive plumbing relocations.
Step 2: Build a Real Cost Breakdown and Budget Buffer
Accurate budgeting prevents the financial stress that derails bathroom renovations halfway through when homeowners realize they’ve spent 80% of their budget but only completed 50% of the work.
Create a Cost Breakdown by Category
Separate your budget into specific categories: labor (typically 40-50% of total costs), materials (tile, flooring, drywall, waterproofing), plumbing fixtures (toilet, shower valve, faucets), electrical work (new circuits, outlets, lighting), tile installation, and glass shower doors. This breakdown shows where money goes and helps you adjust spending strategically.
For example, if your $15,000 budget includes $6,000 for labor, $3,000 for tile and installation, $2,000 for plumbing fixtures, $1,500 for a vanity, $1,200 for glass shower doors, $800 for electrical work, and $500 for miscellaneous items, you can make informed decisions about where to upgrade or downgrade based on priorities.
Add a Buffer for Surprises
Every bathroom renovation uncovers unexpected issues after demolition. Subfloor repairs, hidden water damage behind shower walls, outdated wiring that needs replacement, or corroded plumbing that fails code inspection all add costs you can’t predict before opening walls.
Budget an additional 15-20% beyond your planned expenses for these surprises. On a $15,000 bathroom remodel, set aside $2,250 to $3,000 for unexpected repairs. This buffer prevents the panic that happens when your contractor discovers problems that must be fixed before continuing work.
Step 3: Draw Up a Bathroom Renovation Plan and Floor Plan
A clear floor plan helps you visualize the finished space, test different layout options, and communicate your vision to contractors who bid on the work.
Start With Function
Before worrying about aesthetics, address functional needs. How much storage do you need for toiletries, towels, and cleaning supplies? Is counter space adequate for two people getting ready simultaneously? Does traffic flow allow comfortable movement between the toilet, shower, and vanity? Does the shower entry have enough clearance or does the door swing into the toilet?
Measure your current bathroom carefully, noting door swings, window locations, existing plumbing positions, and any obstacles like radiators or sloped ceilings. These constraints affect what changes are possible without major structural work.
Use Simple Tools
You don’t need expensive software to plan a bathroom renovation. Graph paper works perfectly for sketching layouts to scale. Each square can represent 6 inches, making it easy to draw your bathroom dimensions and test different vanity sizes, shower configurations, and storage solutions.
Basic 3D bathroom design tools available free online let you visualize layouts before demolition. These tools help you see how a 60-inch double vanity fits compared to a 48-inch single sink, or whether a walk-in shower provides enough space without feeling cramped.
Step 4: Choose Your Products and Lock In Lead Times
Material delays halt bathroom renovations more often than any other factor. Ordering products early prevents sitting with an unusable bathroom for weeks while waiting for backordered items.
Prioritize Long-Lead Items First
Vanities, glass shower doors, shower enclosures, specialty tile, and custom lighting fixtures often carry 4-8 week lead times from order to delivery. Identify these items during planning and order them before demolition begins so they arrive when installers need them.
Call suppliers or check manufacturer websites for current lead times rather than assuming items ship immediately. A beautiful vanity that takes 10 weeks to arrive extends your renovation timeline significantly if you don’t order it early enough.
Match Products to Daily Use
Choose shower controls that operate intuitively, not ones you’ll struggle with every morning. Select a rainfall showerhead that provides adequate water pressure, not just Instagram-worthy aesthetics. Pick shower wall tile that cleans easily in Denver’s hard water rather than porous stone that stains. Consider durable, easy-clean finishes for faucets, hardware, and surfaces you’ll touch daily.
Functionality outlasts trends. A well-designed shower with practical features delivers more long-term satisfaction than one chosen purely for appearance that creates daily frustrations.
Step 5: Understand Building Codes, Permits, and Inspection Timing
Permits aren’t optional bureaucracy—they’re legal requirements that protect you from unsafe work and problems selling your home later.
When Permits Usually Apply
Moving plumbing fixtures, adding new electrical circuits, installing heated floors, or converting a tub to a walk-in shower all require permits in most Colorado jurisdictions. Cosmetic updates like painting, replacing fixtures in the same location, or swapping vanities without plumbing changes typically don’t need permits.
Contact your local building department early to understand specific requirements for your city. Denver, Aurora, Thornton, and Arvada each have slightly different processes and fee structures.
Plan for Inspections
Rough plumbing and electrical inspections happen after pipes and wiring are installed but before walls close with drywall. These approvals can pause work for 3-5 days if not scheduled early or if the inspector finds code violations requiring corrections.
Factor inspection timing into your renovation schedule. A contractor who understands local inspection requirements schedules these appointments proactively rather than discovering mid-project that work can’t proceed without approval.
Step 6: Pick Your Team: DIY vs Bathroom Remodeler vs General Contractor
Understanding what you can handle yourself and what requires professional expertise prevents costly mistakes and ensures code compliance.
What a Homeowner Can Do
Design selection, ordering materials, painting, and simple fixture swaps (faucets, light fixtures, hardware) fall within most homeowners’ capabilities. These tasks save money on labor without risking improper installation that causes damage.
Demolition seems straightforward but requires care around plumbing lines, electrical wiring, and structural elements. If you’re comfortable with basic construction and tool use, demo can reduce costs by $500-$1,000.
What Should Be Handled by Pros
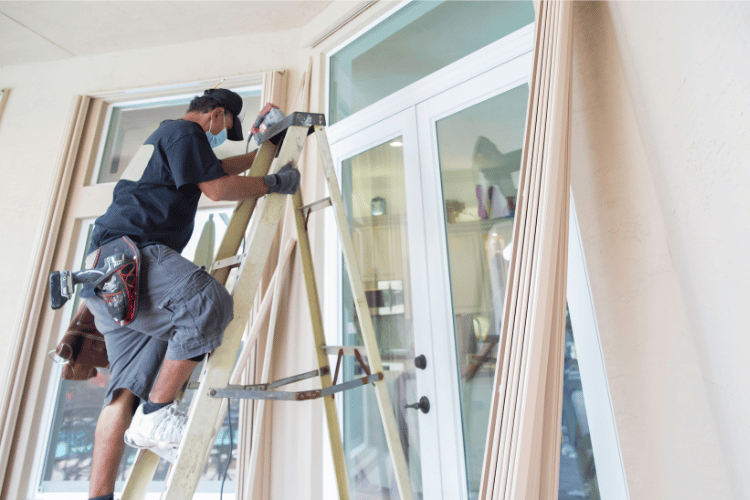
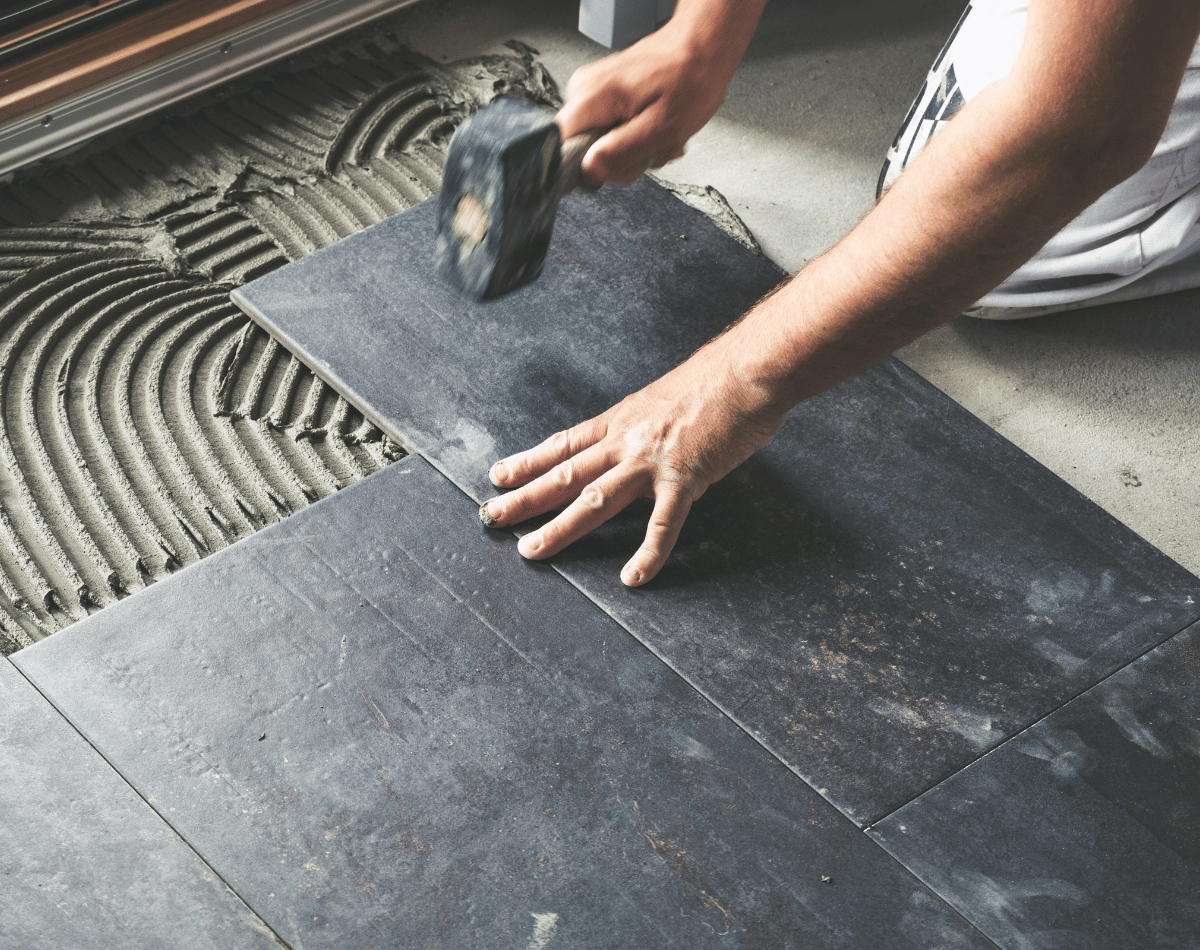
Waterproofing shower walls and floors must be done correctly or water damage costs thousands to repair. Tile installation requires skill to maintain level surfaces, proper spacing, and clean grout lines. Plumbing moves need licensed professionals who understand code requirements and proper drain slope. Electrical work requires permits and inspections that licensed electricians handle routinely. Glass shower door installation demands precise measurements and proper sealing.
These tasks cost more for good reason—they directly affect your bathroom’s safety, functionality, and longevity.
How to Compare Bids
Request detailed proposals from at least three contractors that specify scope, timeline, materials included, payment schedule, warranty terms, and who handles permits and inspections. Vague estimates that list a single lump sum without breakdowns make it impossible to compare bids fairly or understand what you’re paying for.
Meet the actual crew who will work in your home, not just salespeople. Verify license status, insurance coverage, and recent references. The lowest bid isn’t always the best value if the contractor cuts corners or disappears mid-project.
Step 7: Follow the Right Remodel Order From Demo to Finish
Proper sequencing prevents rework and keeps bathroom renovations progressing efficiently from start to completion.
Typical Build Sequence
Demolition comes first, removing old fixtures, tile, and damaged materials. Subfloor inspection happens immediately after demo to identify rot, water damage, or structural issues requiring repair before new finishes go in.
Plumbing and electrical rough-in follows subfloor work, installing new pipes, drains, wiring, and outlets before walls close. Inspections must pass before proceeding. Waterproofing goes on shower walls and floor after rough-in approval.
Shower wall tile installation happens next, starting from the floor and working up. Glass shower doors get measured after tile completes. Vanity installation, lighting fixture mounting, and painting come near the end of the sequence.
Finish Strong
Final details matter as much as major installations. Proper caulking prevents water intrusion. Hardware installation (towel bars, toilet paper holders, cabinet pulls) completes the functional setup. A thorough punch list addresses any minor corrections before final inspection and project handoff.
Clean the bathroom completely, removing construction dust and debris. Test all fixtures, ensure drains flow properly, and verify lighting works correctly before considering the project finished.
5 Tips to Get Your Bathroom Remodeling Project Off on the Right Foot
Following these practical tips prevents the most common bathroom renovation mistakes:
1. Finalize the layout before buying anything, even small items: Changing your mind after purchasing tile, fixtures, or vanities costs money in restocking fees and wasted materials. Confirm every detail before ordering.
2. Order tile, vanity, and glass shower doors early to avoid delays: Long lead times on these items halt progress when they arrive late. Order them 6-8 weeks before installation dates.
3. Keep plumbing fixtures in the same location if budget is tight: Relocating drains and supply lines adds thousands to costs without improving function if the current layout works adequately.
4. Plan lighting fixtures and outlet locations before walls close: Adding outlets or moving light switches after drywall installation requires cutting holes and patching, creating extra work and expense.
5. Build a written remodeling plan and keep all product specs in one place: A central document with measurements, product model numbers, finish selections, and vendor contact information prevents confusion and ordering mistakes.
Hire a Bathroom Remodeler for Your Next Project – We’ll Take Care of Planning, Design and Build
Planning a bathroom renovation feels overwhelming when you’re managing design decisions, product selections, contractor bids, permit applications, and construction schedules simultaneously. Superior Construction handles the entire process from initial consultation through final inspection so you make decisions once rather than constantly troubleshooting problems.
We create detailed bathroom renovation plans with accurate cost breakdowns, realistic timelines, and floor plans that optimize your space. Our team manages product ordering with proper lead times, handles all permits and inspections, and coordinates licensed plumbers, electricians, and tile installers under one general contractor.
Schedule a free consultation to talk about your bathroom remodeling goals and get a comprehensive proposal that outlines the details of each phase.